sirkumsisi
DESCRIPTION
Tehnik sirkumsisiTRANSCRIPT
Sirkumsisi
• Teknik Sirkumsisi– Dorsal Slit– Quillotine– Sleeve
Metode Quillotine
• Memotong preputium secara langsung pada preputium yang dibatasi oleh forcep (amputasi)
• Keuntungan– Dapat dilakukan di klinik– Menggunakan alat yang lebih sedikit
• Kerugian– Risiko cedera pada glans penis besar– Meninggalkan sisa mukosa sekitar 0,5 – 1 cm di corona
glandis
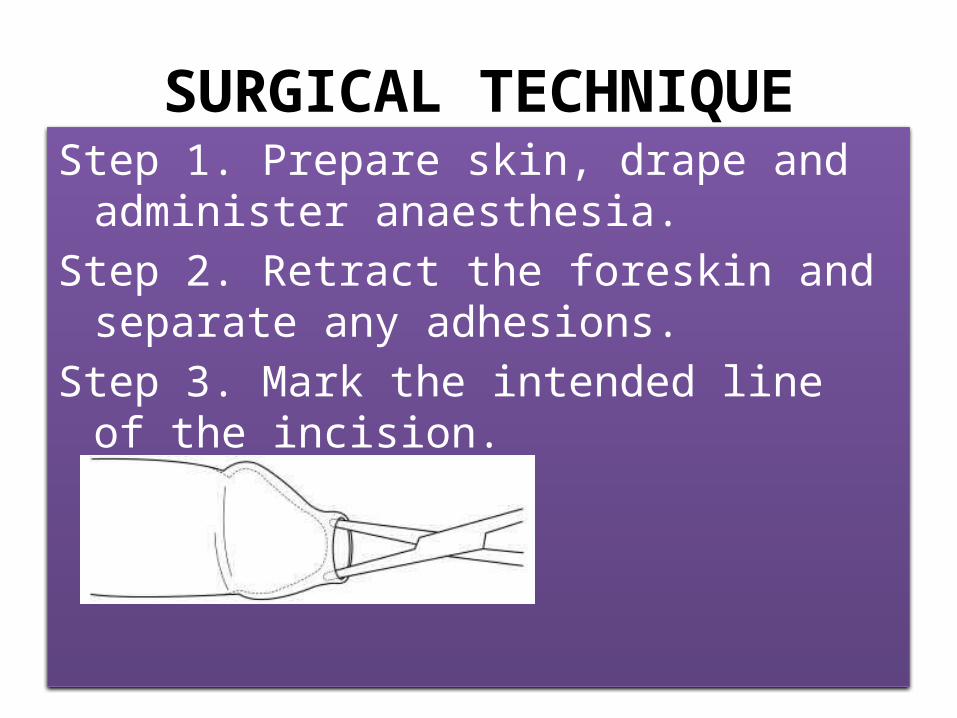
SURGICAL TECHNIQUEStep 1. Prepare skin, drape and administer
anaesthesia.Step 2. Retract the foreskin and separate any
adhesions.Step 3. Mark the intended line of the incision.
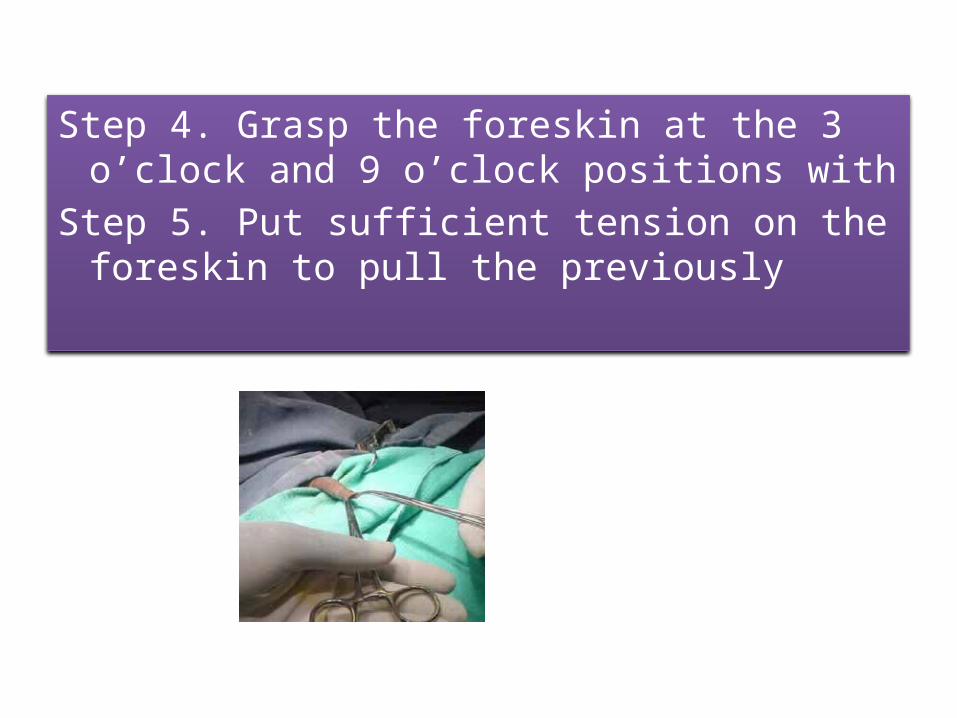
Step 4. Grasp the foreskin at the 3 o’clock and 9 o’clock positions with
Step 5. Put sufficient tension on the foreskin to pull the previously
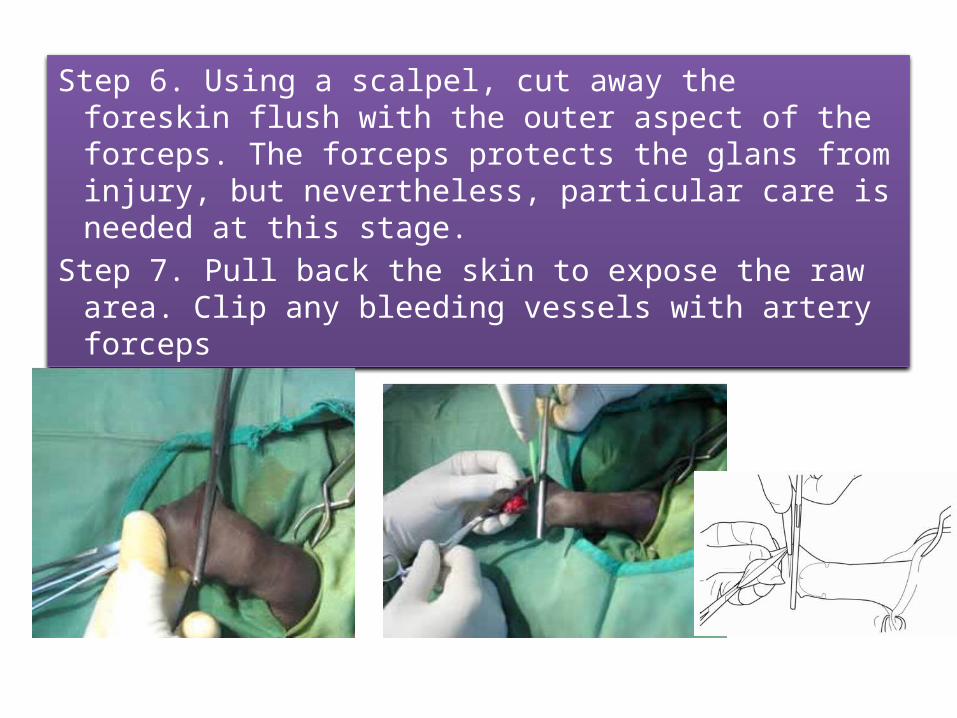
Step 6. Using a scalpel, cut away the foreskin flush with the outer aspect of the forceps. The forceps protects the glans from injury, but nevertheless, particular care is needed at this stage.
Step 7. Pull back the skin to expose the raw area. Clip any bleeding vessels with artery forceps
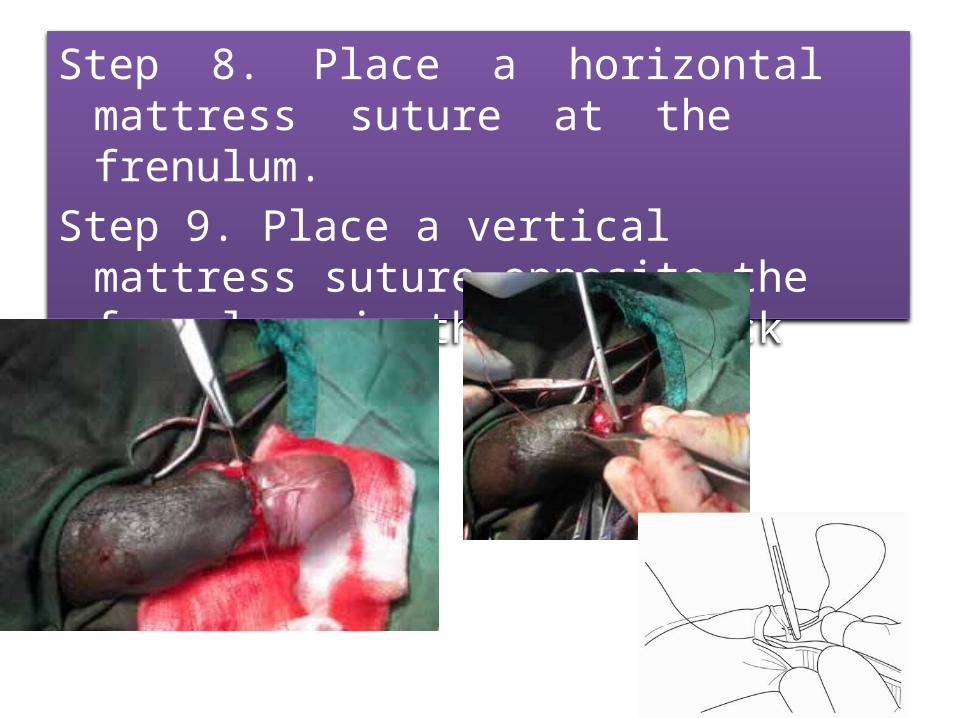
Step 8. Place a horizontal mattress suture at the frenulum.
Step 9. Place a vertical mattress suture opposite the frenulum, in the 12 o’clock position
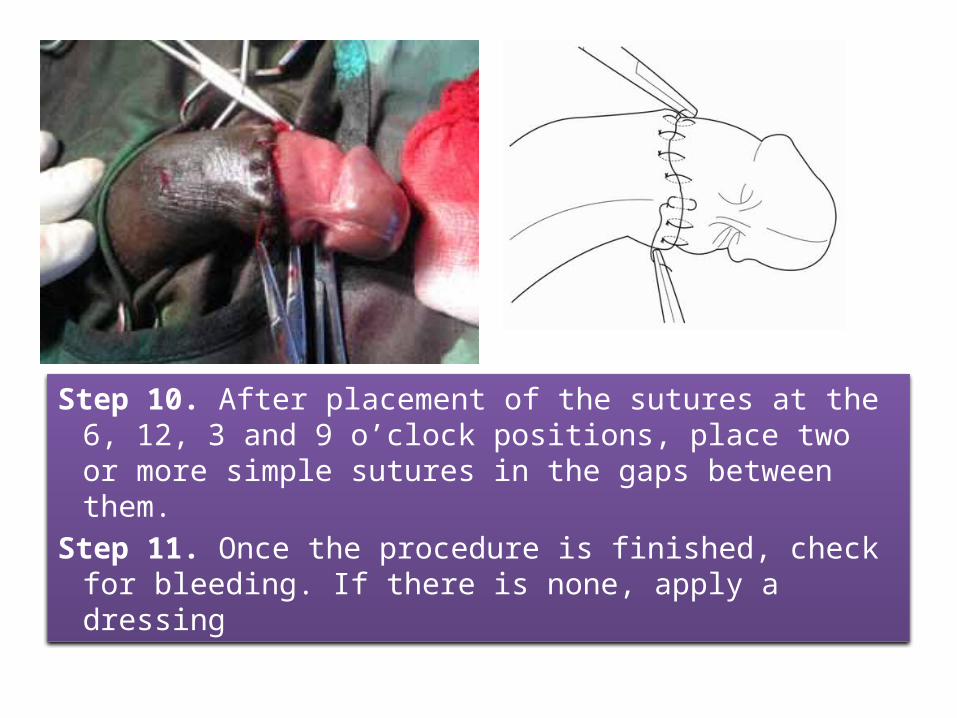
Step 10. After placement of the sutures at the 6, 12, 3 and 9 o’clock positions, place two or more simple sutures in the gaps between them.
Step 11. Once the procedure is finished, check for bleeding. If there is none, apply a dressing

Metode Dorsal Slit
• Memotong preputium pada pukul 12 sampai ke korona glandis kemudian preputium dipotong secara sirkuler
• Keuntungan:– Dapat dikerjakan di klinik– Membutuhkan alat yang standar– Risiko glans penis terluka kecil– Panjang mukosa yang dipotong dapat ditentukan– Dapat digunakan pada pasien dengan phymosis atau
parahymosis• Kerugian
– Risiko perdarahan besar tanpa menggunakan cauter– Estetika hasil sirkumsisi tergantung keahlian operator
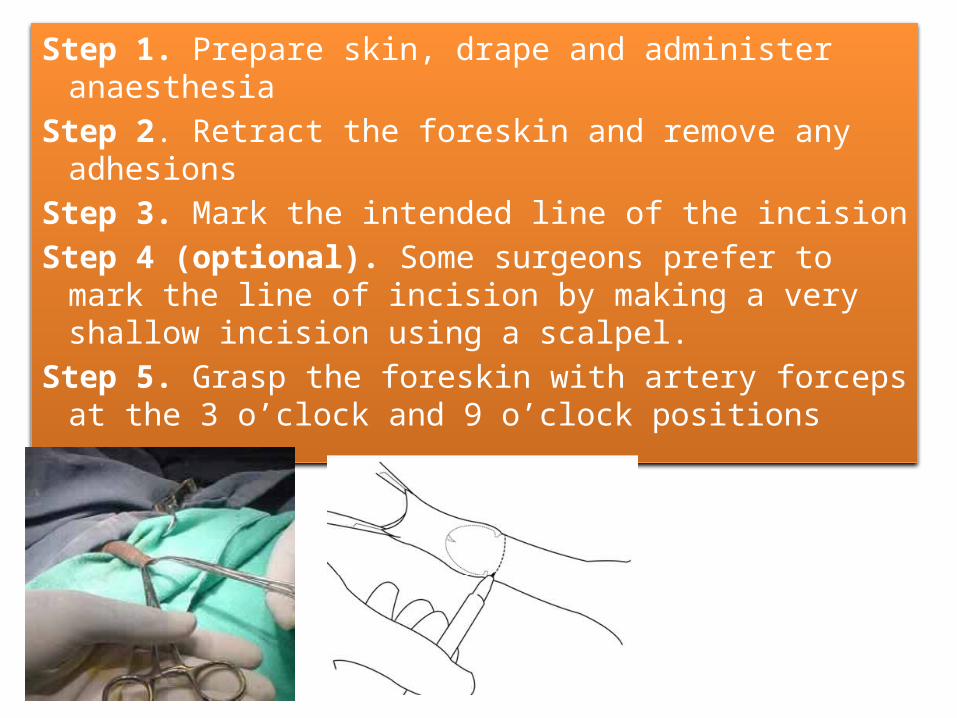
Step 1. Prepare skin, drape and administer anaesthesiaStep 2. Retract the foreskin and remove any adhesionsStep 3. Mark the intended line of the incisionStep 4 (optional). Some surgeons prefer to mark the
line of incision by making a very shallow incision using a scalpel.
Step 5. Grasp the foreskin with artery forceps at the 3 o’clock and 9 o’clock positions
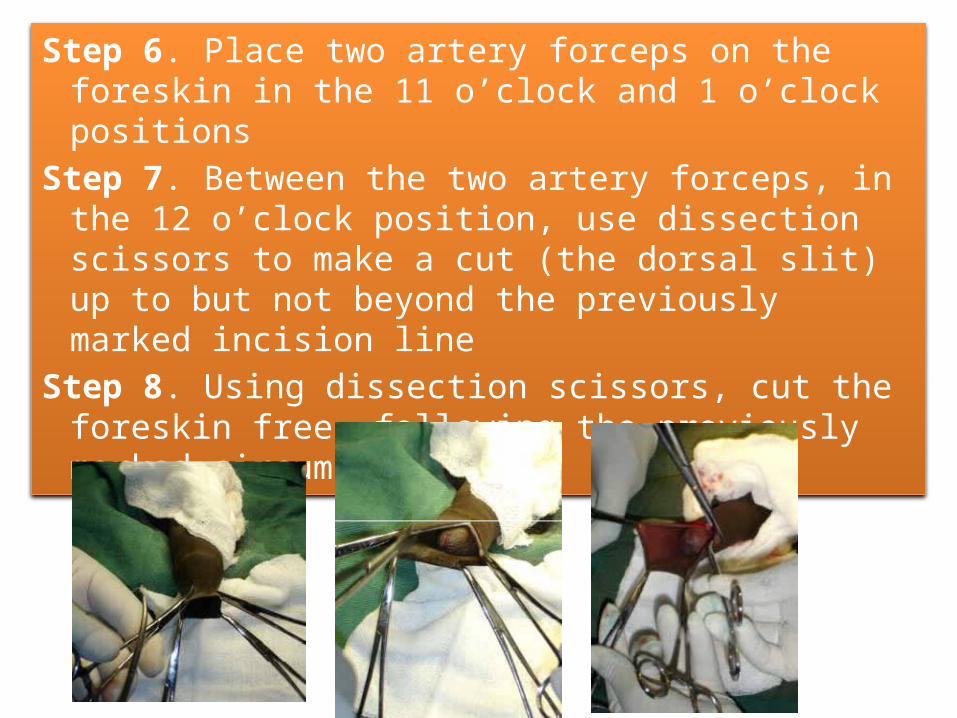
Step 6. Place two artery forceps on the foreskin in the 11 o’clock and 1 o’clock positions
Step 7. Between the two artery forceps, in the 12 o’clock position, use dissection scissors to make a cut (the dorsal slit) up to but not beyond the previously marked incision line
Step 8. Using dissection scissors, cut the foreskin free, following the previously marked circumcision
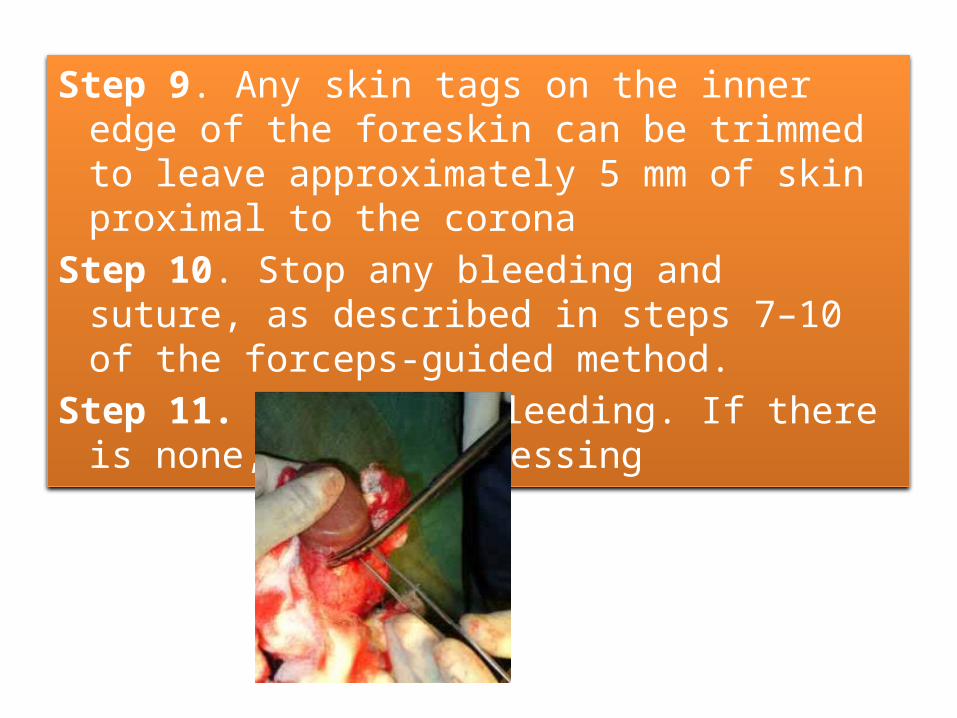
Step 9. Any skin tags on the inner edge of the foreskin can be trimmed to leave approximately 5 mm of skin proximal to the corona
Step 10. Stop any bleeding and suture, as described in steps 7–10 of the forceps-guided method.
Step 11. Check for bleeding. If there is none, apply a dressing
Metode Sleeve
• Memotong preputium pada daerah yang ditandai terlebih dahulu.
• Kelebihan :– Lebih baik bentuknya– Risiko cedera kecil
• Kekurangan :– Memerlukan asisten– Cukup sulit– Tergantung keahlian operator
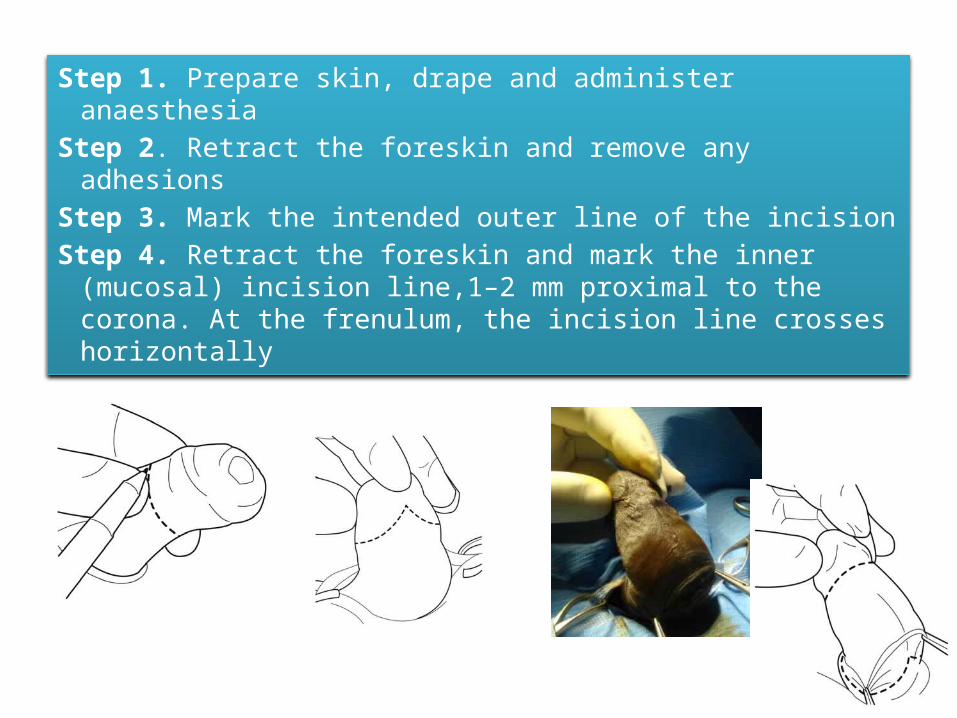
Step 1. Prepare skin, drape and administer anaesthesiaStep 2. Retract the foreskin and remove any adhesionsStep 3. Mark the intended outer line of the incisionStep 4. Retract the foreskin and mark the inner (mucosal)
incision line,1–2 mm proximal to the corona. At the frenulum, the incision line crosses horizontally
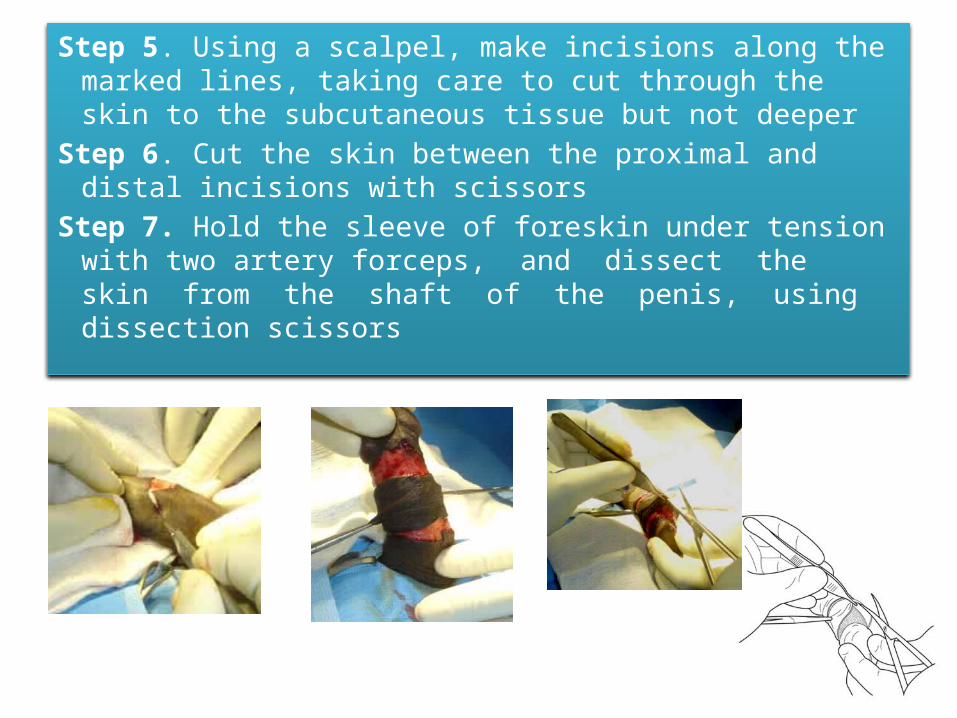
Step 5. Using a scalpel, make incisions along the marked lines, taking care to cut through the skin to the subcutaneous tissue but not deeper
Step 6. Cut the skin between the proximal and distal incisions with scissors
Step 7. Hold the sleeve of foreskin under tension with two artery forceps, and dissect the skin from the shaft of the penis, using dissection scissors
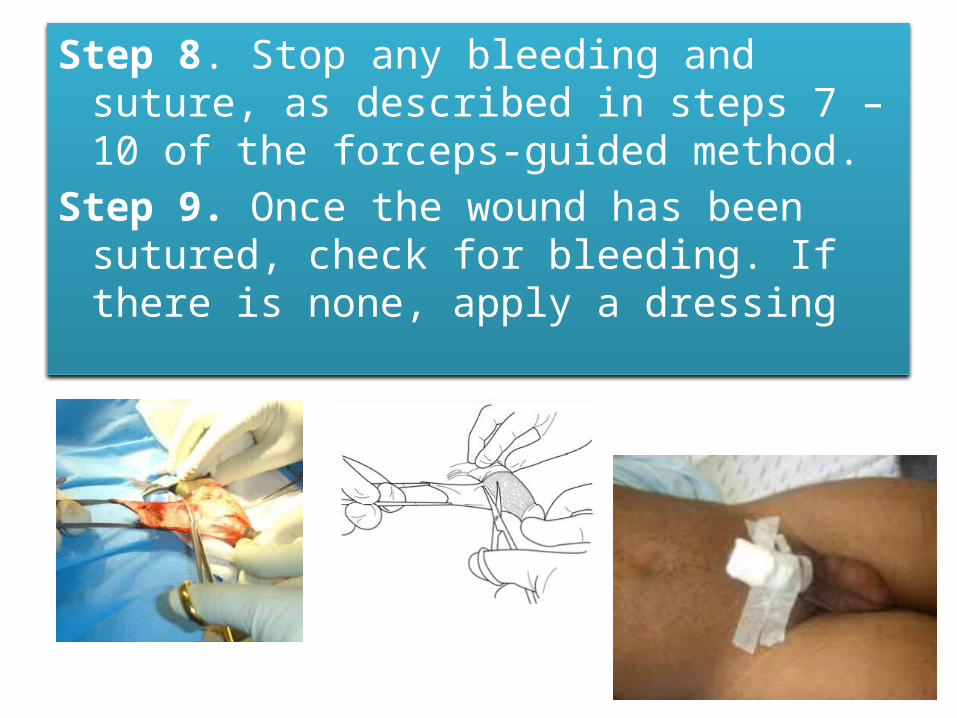
Step 8. Stop any bleeding and suture, as described in steps 7 – 10 of the forceps-guided method.
Step 9. Once the wound has been sutured, check for bleeding. If there is none, apply a dressing