modul praktikum 03 virtualization dhcp dns · modul praktikum jaringan komputer - fakultas...
TRANSCRIPT
Modul Praktikum Jaringan Komputer - Fakultas Teknologi Informasi, Universitas Kristen Maranatha Bandung
MODUL PRAKTIKUM 03
VIRTUALIZATION, DHCP, DNS
TUJUAN
Setelah praktikum dilaksanakan, peserta praktikum diharapkan memiliki kemampuan
1. Membuat dan melakukan konfigurasi pada mesin virtual dengan menggunakan VirtualBox
2. Melakukan instalasi dan konfigurasi DHCP Server pada Windows Server 2008
3. Melakukan instalasi dan konfigurasi DNS Server pada Windows Server 2008
PERANGKAT
Perangkat yang digunakan untuk praktikum adalah sbb :
1. VirtualBox
2. CD Linux Ubuntu 8.10
3. Windows Server 2008
4. Kabel UTP Straight atau Cross
5. Switch
PROSEDUR PRAKTIKUM
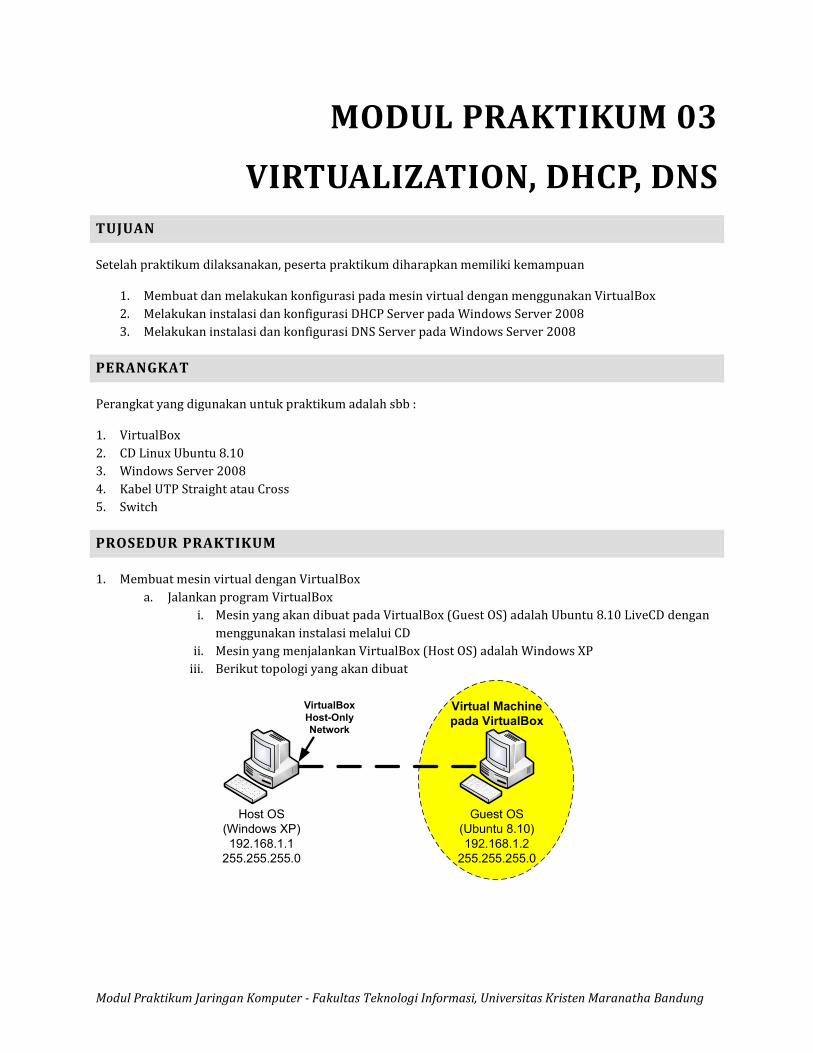
1. Membuat mesin virtual dengan VirtualBox
a. Jalankan program VirtualBox
i. Mesin yang akan dibuat pada VirtualBox (Guest OS) adalah Ubuntu 8.10 LiveCD dengan
menggunakan instalasi melalui CD
ii. Mesin yang menjalankan VirtualBox (Host OS) adalah Windows XP
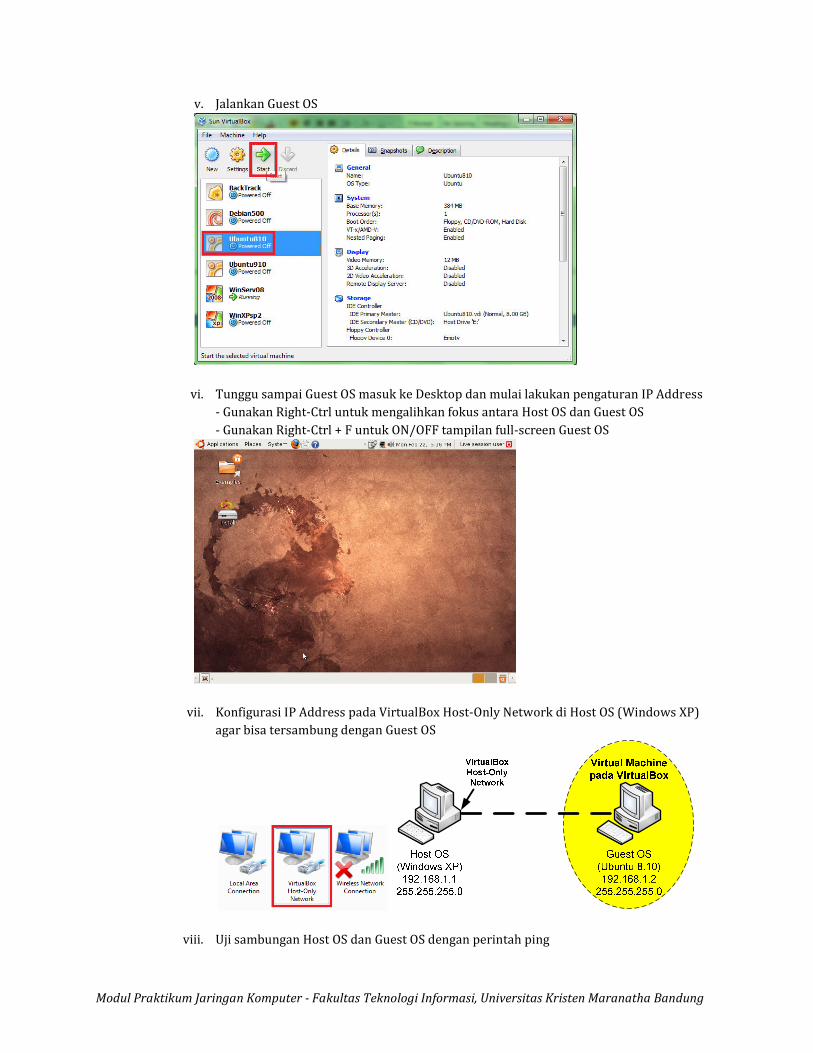
iii. Berikut topologi yang akan dibuat
Host OS
(Windows XP)
192.168.1.1
255.255.255.0
Guest OS
(Ubuntu 8.10)
192.168.1.2
255.255.255.0
VirtualBox
Host-Only
Network
Virtual Machine
pada VirtualBox
Modul Praktikum Jaringan Komputer - Fakultas Teknologi Informasi, Universitas Kristen Maranatha Bandung
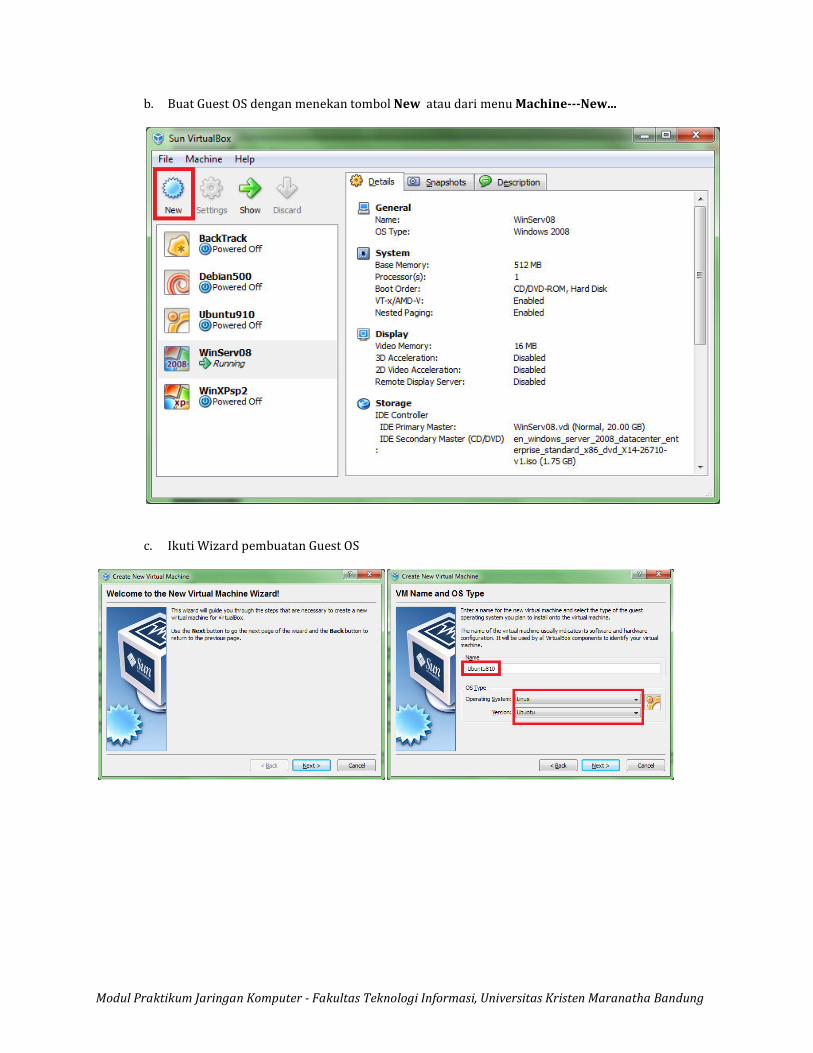
b. Buat Guest OS dengan menekan tombol New atau dari menu Machine---New...
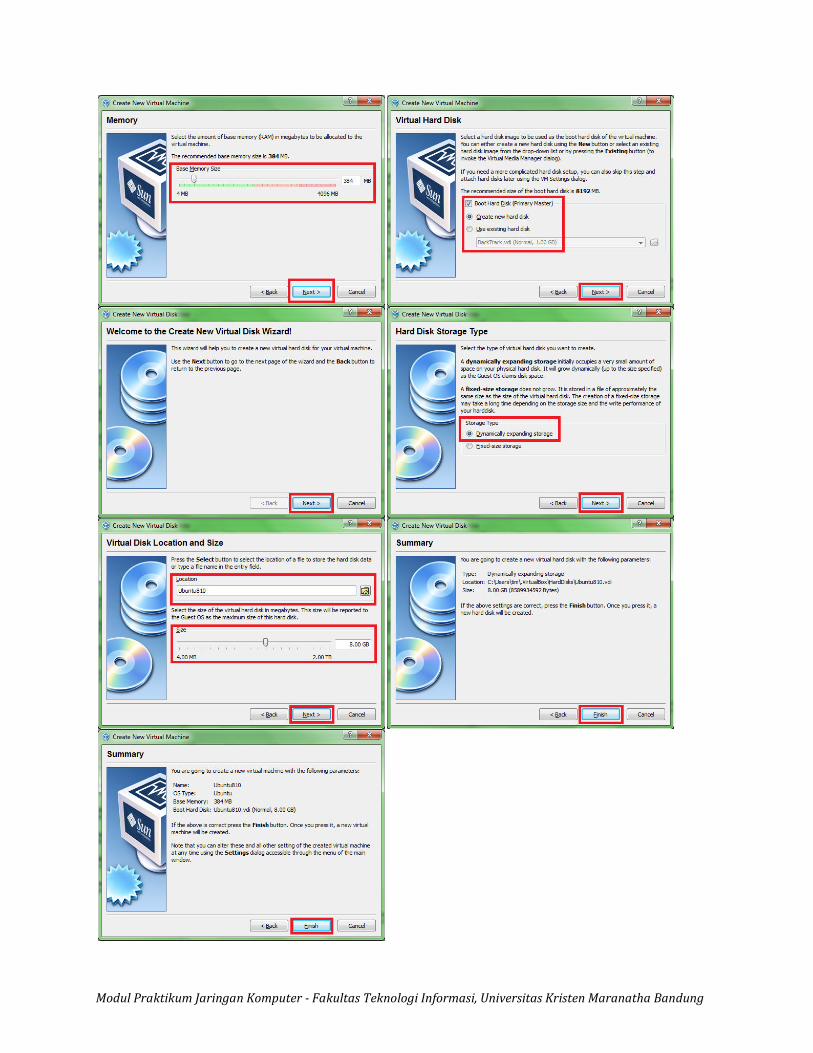
c. Ikuti Wizard pembuatan Guest OS
Modul Praktikum Jaringan Komputer - Fakultas Teknologi Informasi, Universitas Kristen Maranatha Bandung
Modul Praktikum Jaringan Komputer - Fakultas Teknologi Informasi, Universitas Kristen Maranatha Bandung
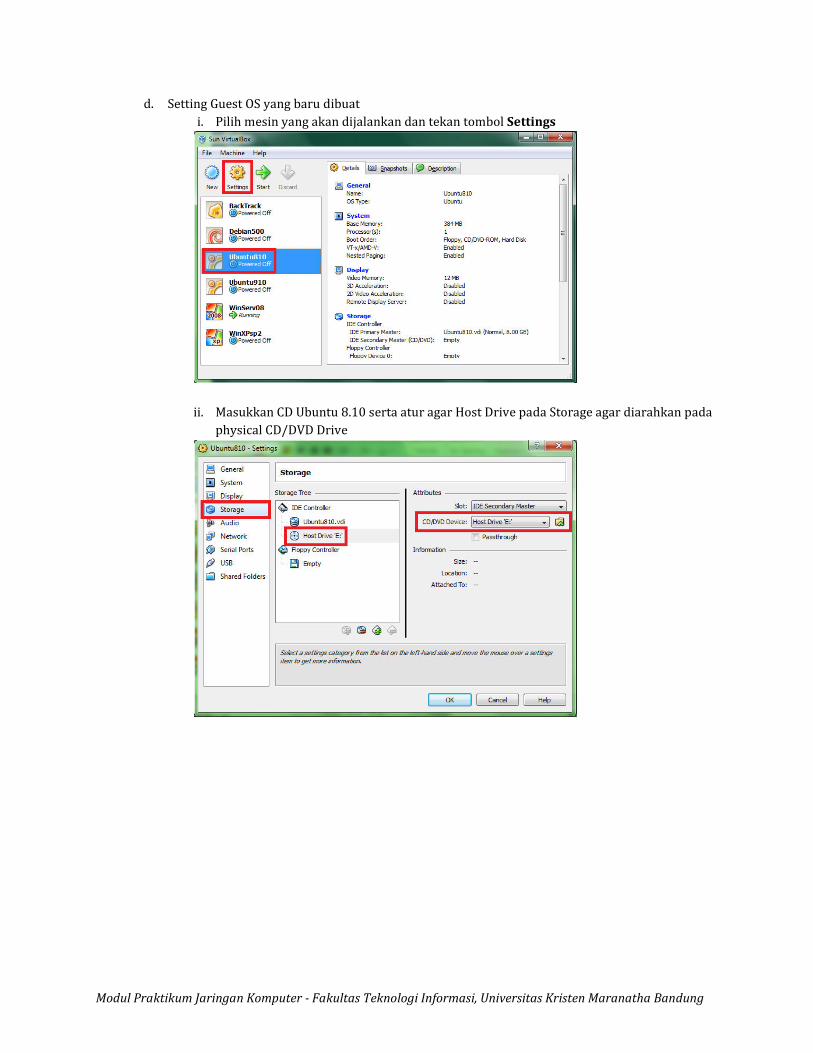
d. Setting Guest OS yang baru dibuat
i. Pilih mesin yang akan dijalankan dan tekan tombol Settings
ii. Masukkan CD Ubuntu 8.10 serta atur agar Host Drive pada Storage agar diarahkan pada
physical CD/DVD Drive
Modul Praktikum Jaringan Komputer - Fakultas Teknologi Informasi, Universitas Kristen Maranatha Bandung
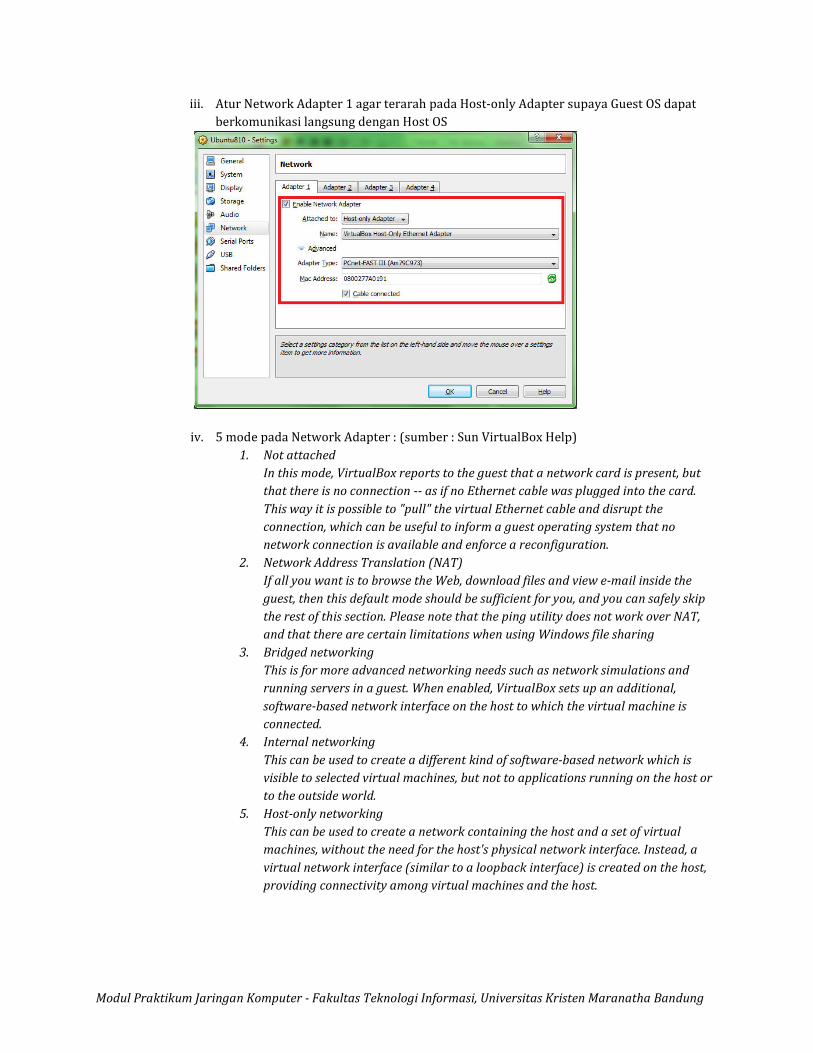
iii. Atur Network Adapter 1 agar terarah pada Host-only Adapter supaya Guest OS dapat
berkomunikasi langsung dengan Host OS
iv. 5 mode pada Network Adapter : (sumber : Sun VirtualBox Help)
1. Not attached
In this mode, VirtualBox reports to the guest that a network card is present, but
that there is no connection -- as if no Ethernet cable was plugged into the card.
This way it is possible to "pull" the virtual Ethernet cable and disrupt the
connection, which can be useful to inform a guest operating system that no
network connection is available and enforce a reconfiguration.
2. Network Address Translation (NAT)
If all you want is to browse the Web, download files and view e-mail inside the
guest, then this default mode should be sufficient for you, and you can safely skip
the rest of this section. Please note that the ping utility does not work over NAT,
and that there are certain limitations when using Windows file sharing
3. Bridged networking
This is for more advanced networking needs such as network simulations and
running servers in a guest. When enabled, VirtualBox sets up an additional,
software-based network interface on the host to which the virtual machine is
connected.
4. Internal networking
This can be used to create a different kind of software-based network which is
visible to selected virtual machines, but not to applications running on the host or
to the outside world.
5. Host-only networking
This can be used to create a network containing the host and a set of virtual
machines, without the need for the host's physical network interface. Instead, a
virtual network interface (similar to a loopback interface) is created on the host,
providing connectivity among virtual machines and the host.
Modul Praktikum Jaringan Komputer - Fakultas Teknologi Informasi, Universitas Kristen Maranatha Bandung
v. Jalankan Guest OS
vi. Tunggu sampai Guest OS masuk ke Desktop dan mulai lakukan pengaturan IP Address
- Gunakan Right-Ctrl untuk mengalihkan fokus antara Host OS dan Guest OS
- Gunakan Right-Ctrl + F untuk ON/OFF tampilan full-screen Guest OS
vii. Konfigurasi IP Address pada VirtualBox Host-Only Network di Host OS (Windows XP)
agar bisa tersambung dengan Guest OS
viii. Uji sambungan Host OS dan Guest OS dengan perintah ping
Modul Praktikum Jaringan Komputer - Fakultas Teknologi Informasi, Universitas Kristen Maranatha Bandung
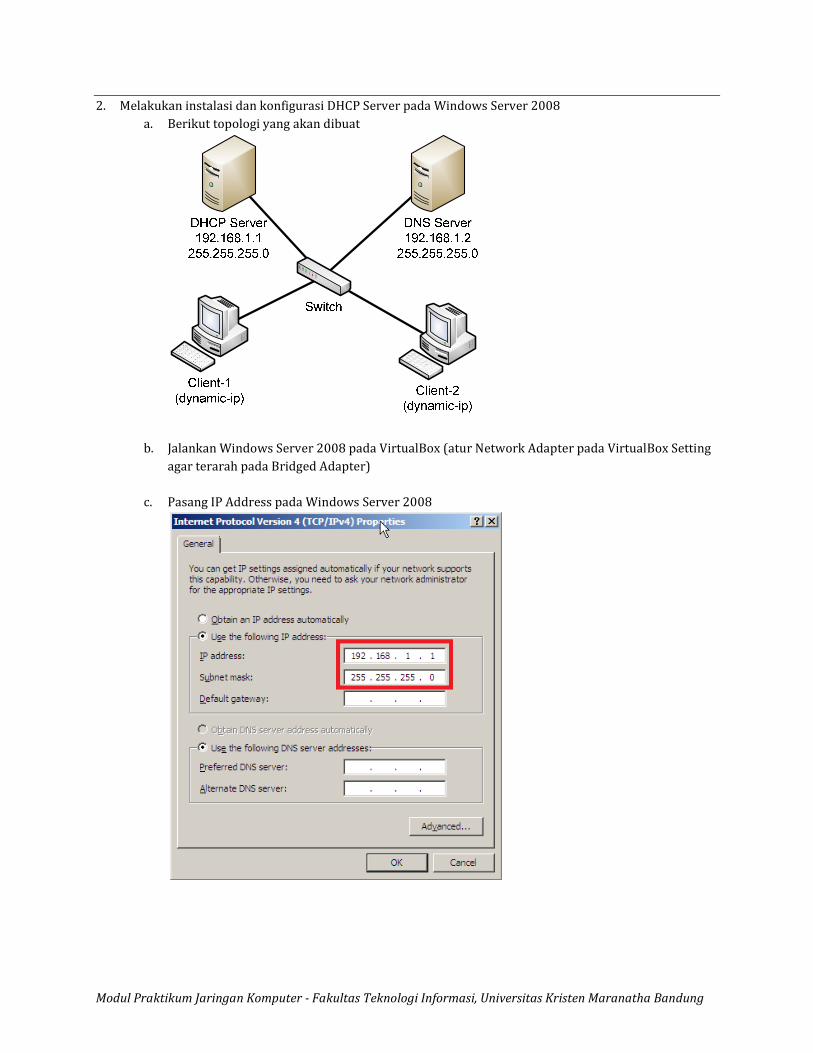
2. Melakukan instalasi dan konfigurasi DHCP Server pada Windows Server 2008
a. Berikut topologi yang akan dibuat
b. Jalankan Windows Server 2008 pada VirtualBox (atur Network Adapter pada VirtualBox Setting
agar terarah pada Bridged Adapter)
c. Pasang IP Address pada Windows Server 2008

Modul Praktikum Jaringan Komputer - Fakultas Teknologi Informasi, Universitas Kristen Maranatha Bandung
d. Instalasi DHCP Server melalui Server Manager
e. Tambahkan peran Server agar menjadi DHCP Server
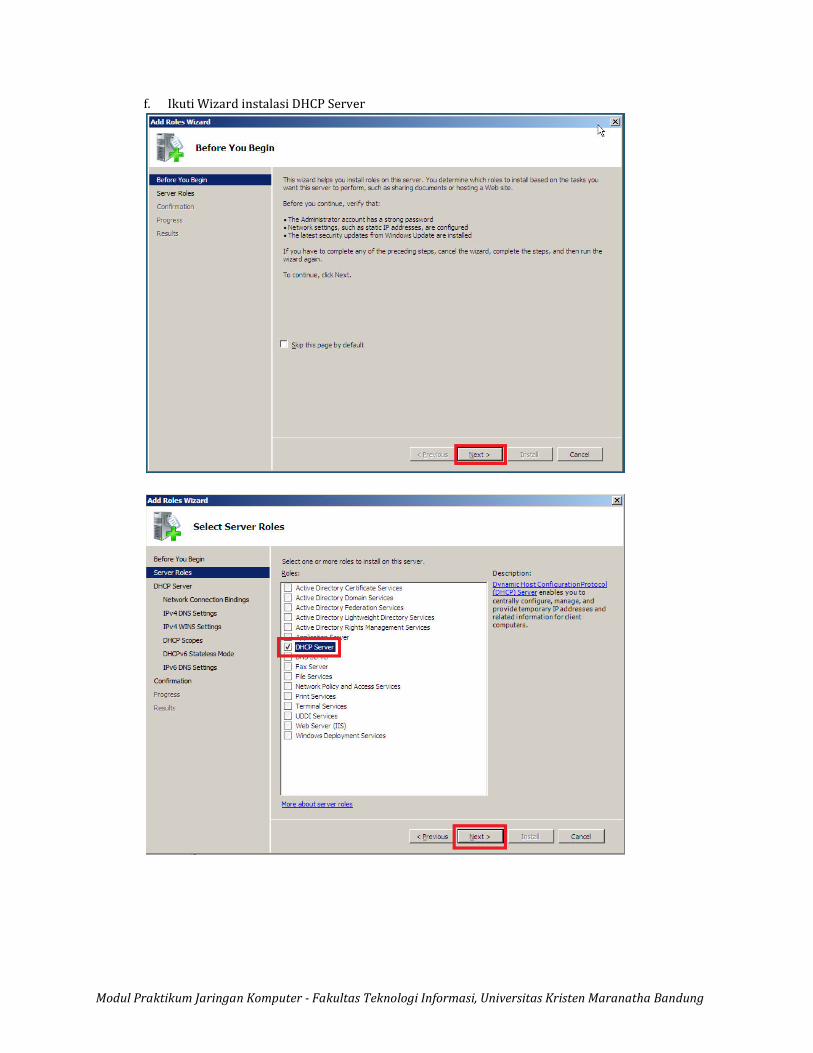
Modul Praktikum Jaringan Komputer - Fakultas Teknologi Informasi, Universitas Kristen Maranatha Bandung
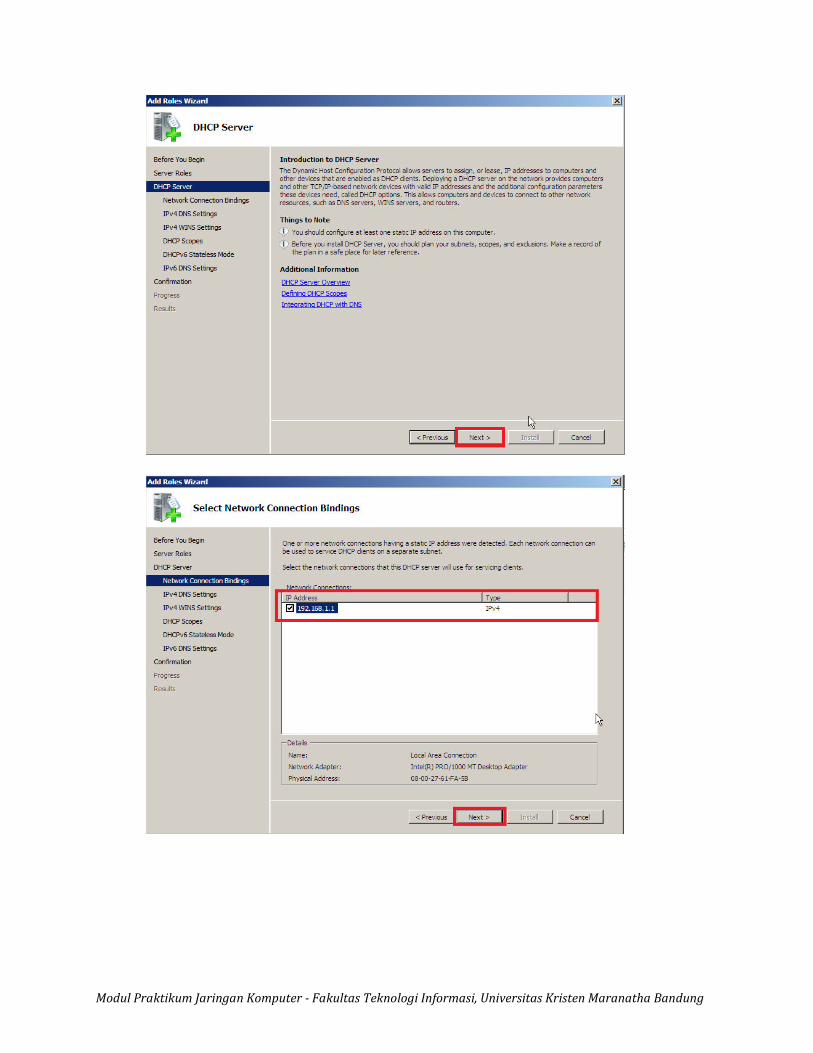
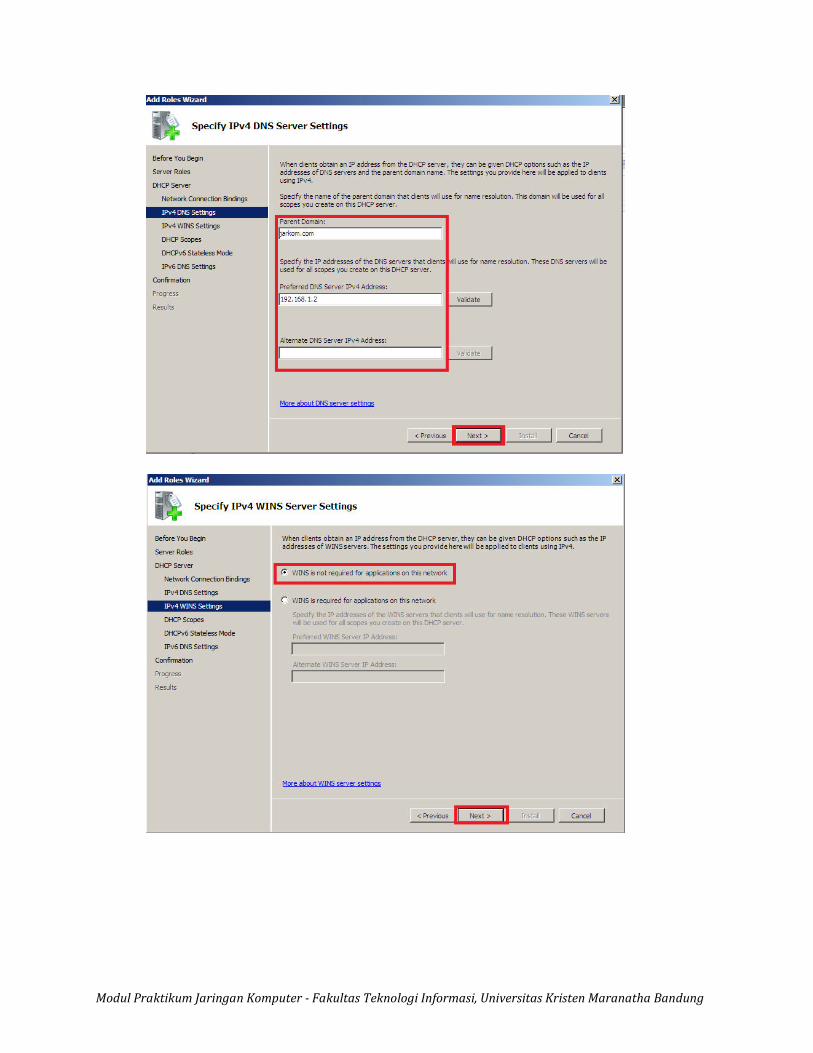
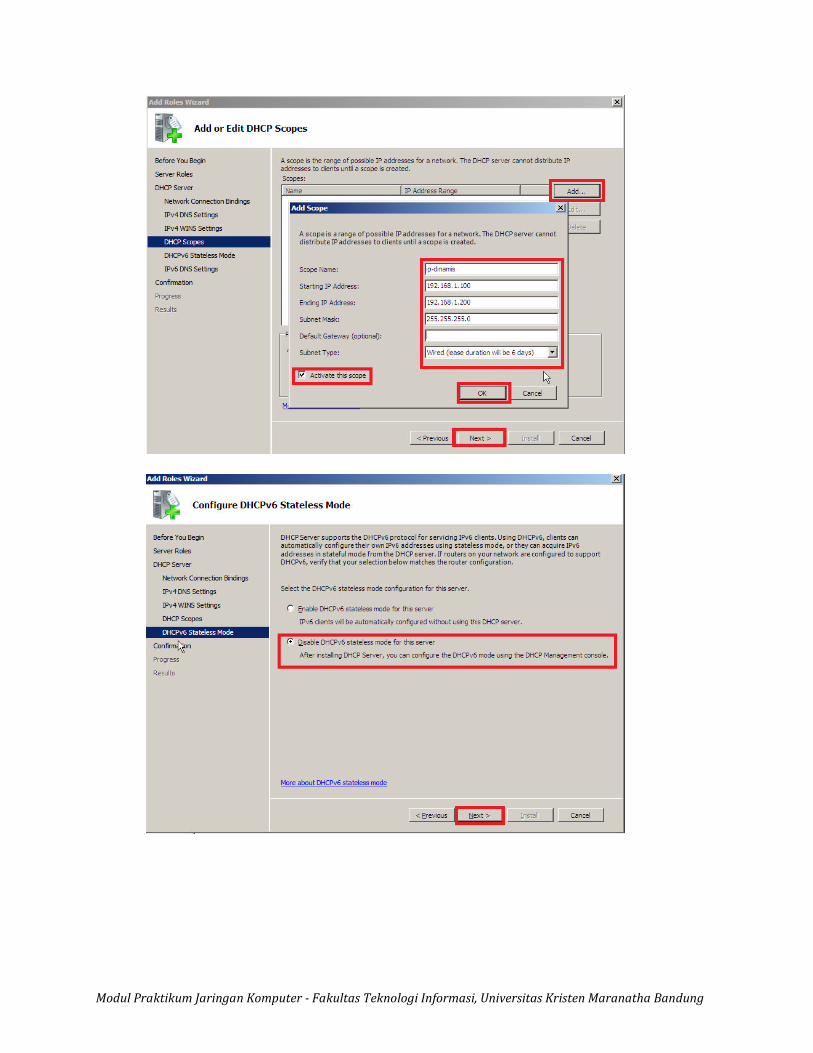
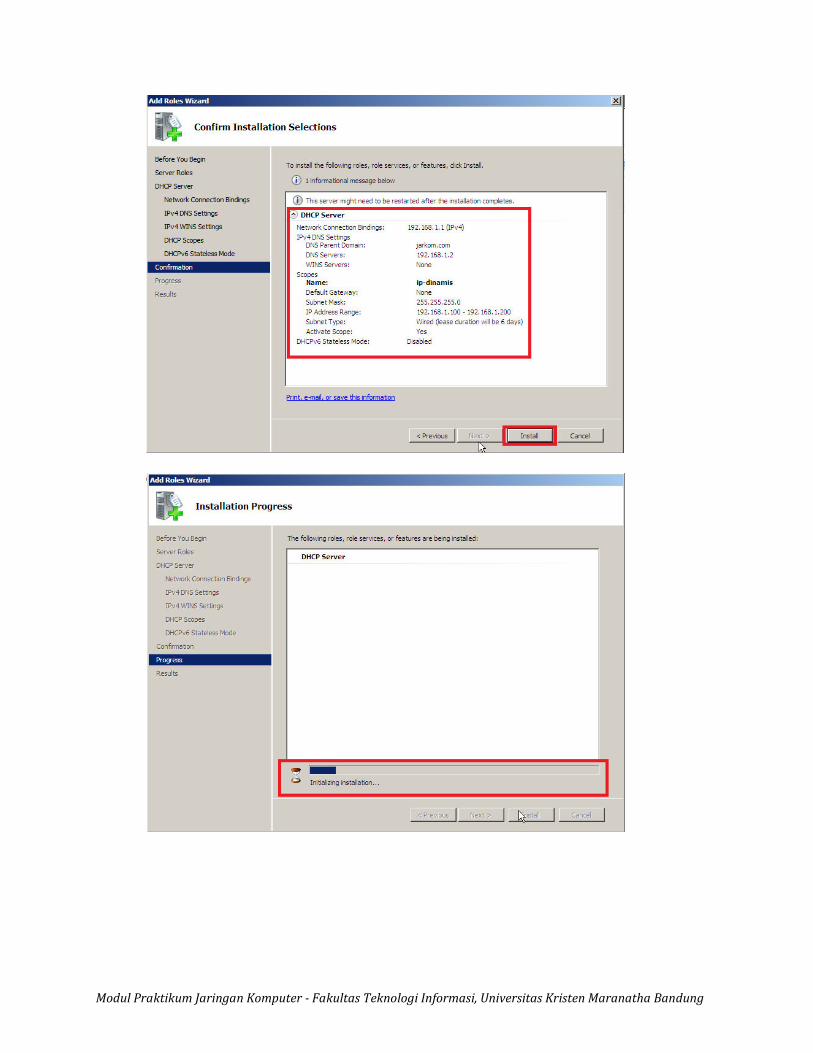
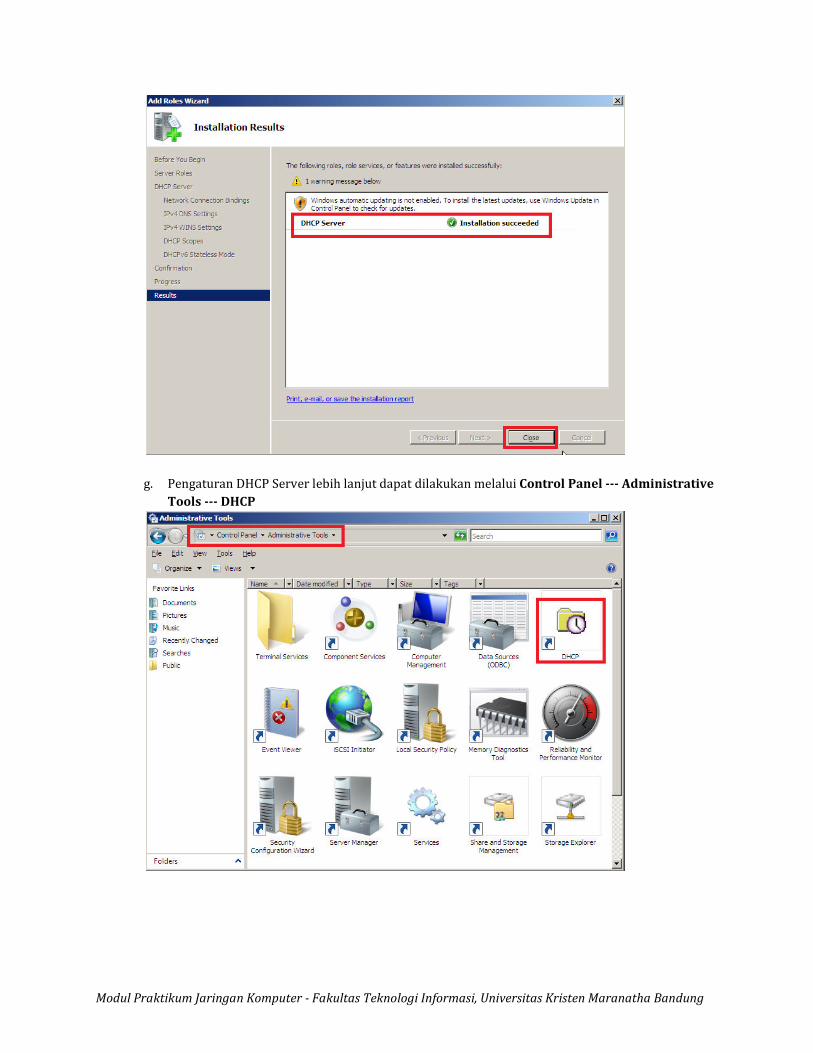
f. Ikuti Wizard instalasi DHCP Server
Modul Praktikum Jaringan Komputer - Fakultas Teknologi Informasi, Universitas Kristen Maranatha Bandung
Modul Praktikum Jaringan Komputer - Fakultas Teknologi Informasi, Universitas Kristen Maranatha Bandung
Modul Praktikum Jaringan Komputer - Fakultas Teknologi Informasi, Universitas Kristen Maranatha Bandung
Modul Praktikum Jaringan Komputer - Fakultas Teknologi Informasi, Universitas Kristen Maranatha Bandung
Modul Praktikum Jaringan Komputer - Fakultas Teknologi Informasi, Universitas Kristen Maranatha Bandung
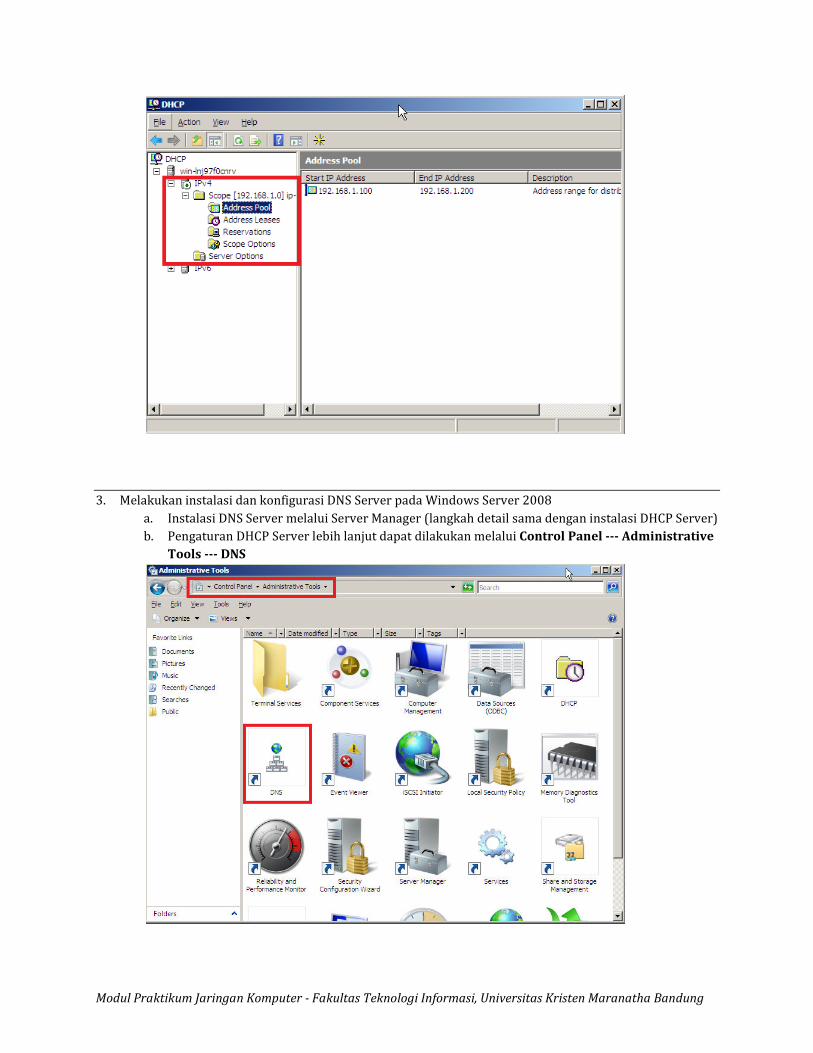
g. Pengaturan DHCP Server lebih lanjut dapat dilakukan melalui Control Panel --- Administrative
Tools --- DHCP
Modul Praktikum Jaringan Komputer - Fakultas Teknologi Informasi, Universitas Kristen Maranatha Bandung
3. Melakukan instalasi dan konfigurasi DNS Server pada Windows Server 2008
a. Instalasi DNS Server melalui Server Manager (langkah detail sama dengan instalasi DHCP Server)
b. Pengaturan DHCP Server lebih lanjut dapat dilakukan melalui Control Panel --- Administrative
Tools --- DNS
Modul Praktikum Jaringan Komputer - Fakultas Teknologi Informasi, Universitas Kristen Maranatha Bandung
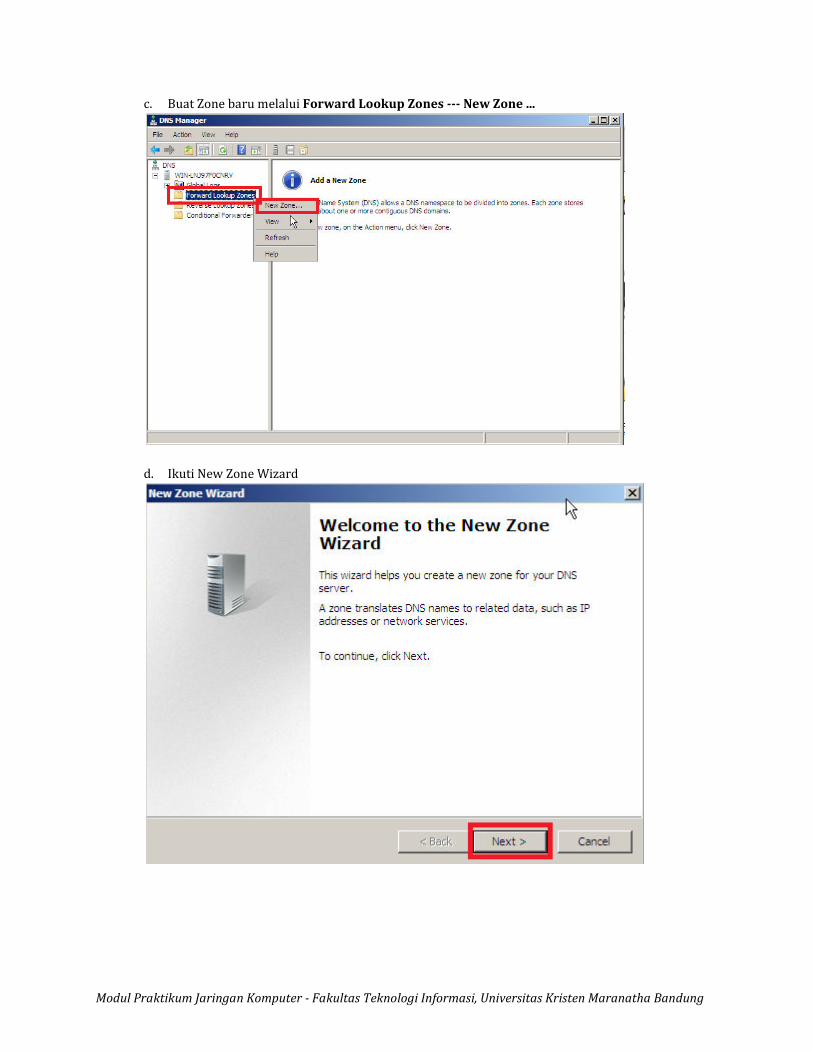
c. Buat Zone baru melalui Forward Lookup Zones --- New Zone ...
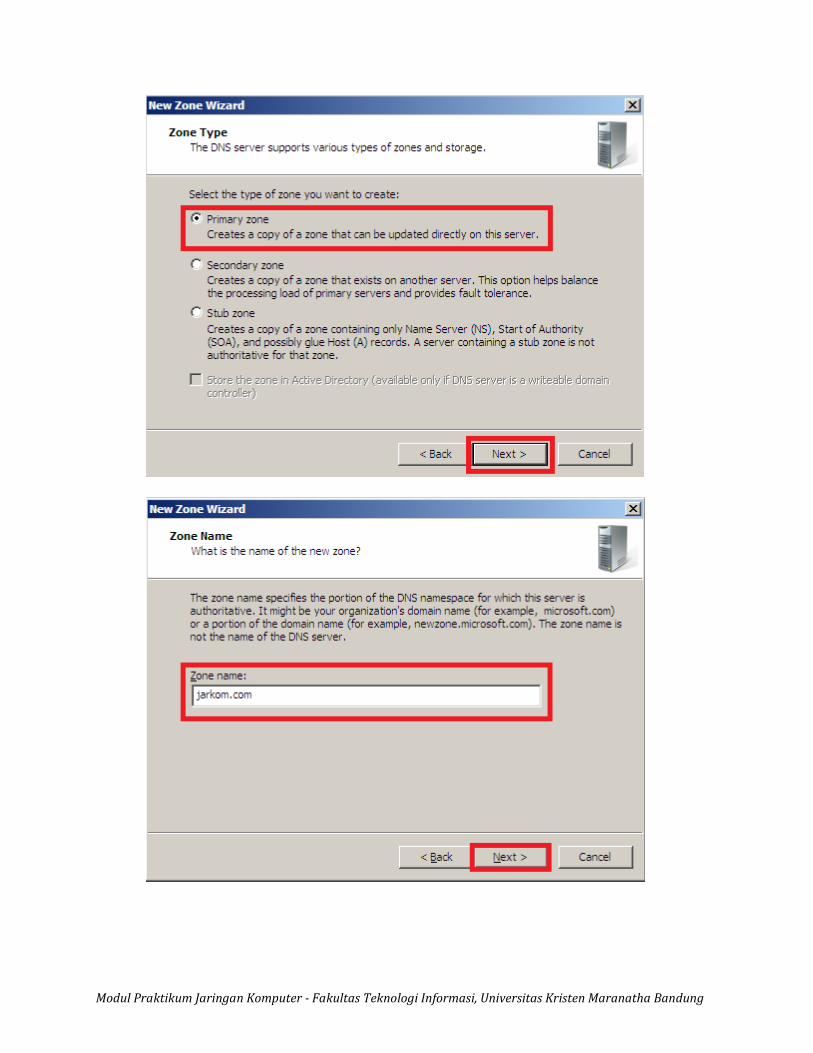
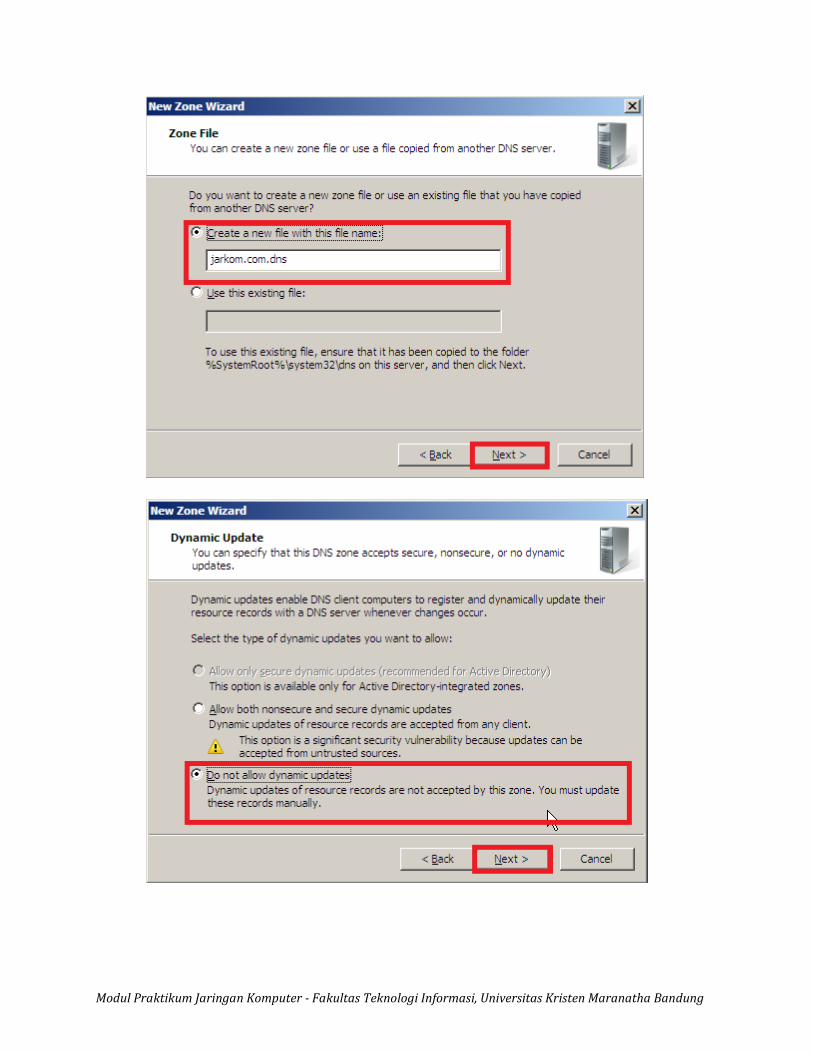
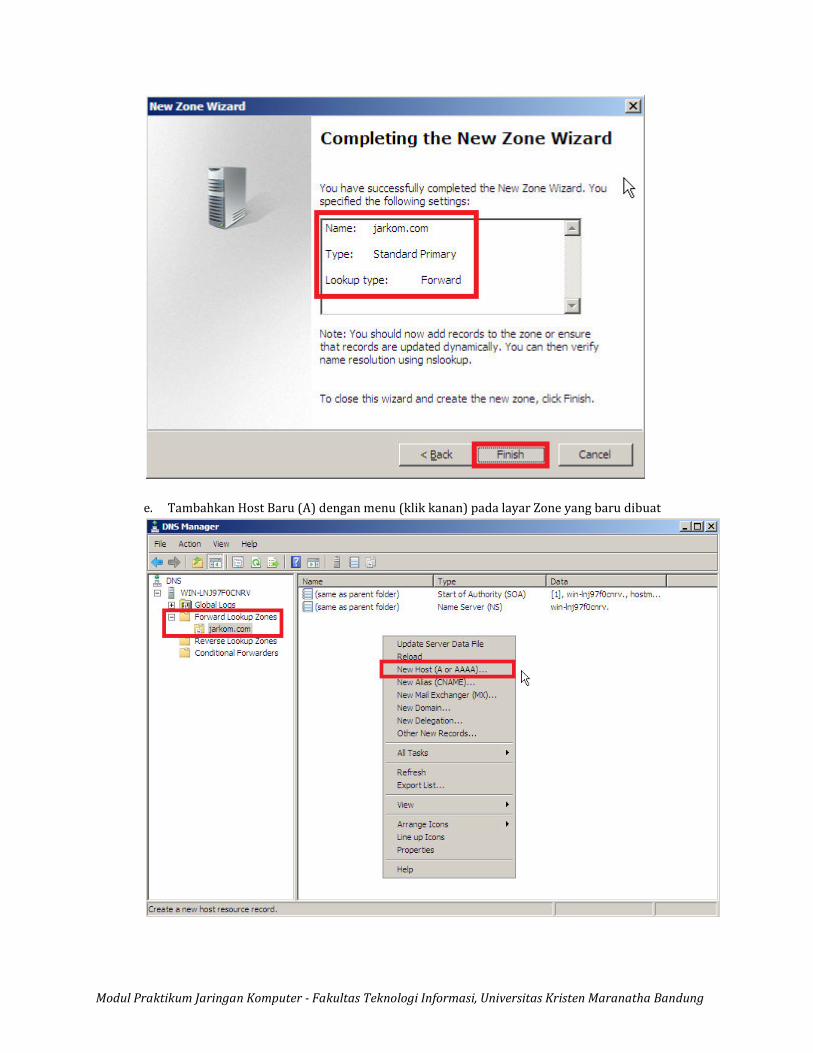
d. Ikuti New Zone Wizard
Modul Praktikum Jaringan Komputer - Fakultas Teknologi Informasi, Universitas Kristen Maranatha Bandung
Modul Praktikum Jaringan Komputer - Fakultas Teknologi Informasi, Universitas Kristen Maranatha Bandung
Modul Praktikum Jaringan Komputer - Fakultas Teknologi Informasi, Universitas Kristen Maranatha Bandung
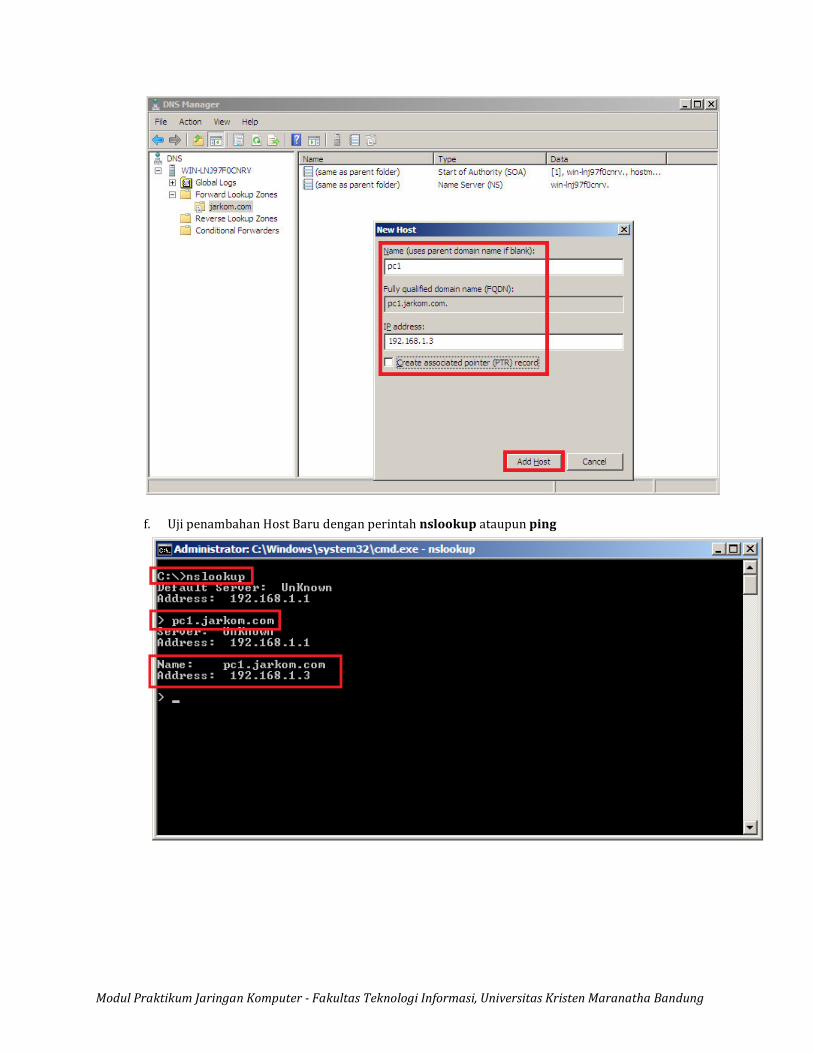
e. Tambahkan Host Baru (A) dengan menu (klik kanan) pada layar Zone yang baru dibuat
Modul Praktikum Jaringan Komputer - Fakultas Teknologi Informasi, Universitas Kristen Maranatha Bandung
f. Uji penambahan Host Baru dengan perintah nslookup ataupun ping